How to Get Rid of QuickBooks Error 88888 in 4 Steps
QuickBooks error 88888 may appear when you attempt to connect to Capital One for the first time. This can prevent you from downloading your bank transactions. You could see the following error message on your screen:
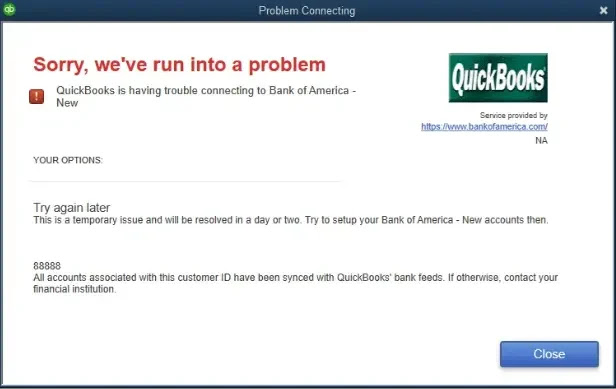
“Sorry, we’ve run into a problem. QuickBooks is having trouble connecting to Capital One Credit Cards.
Your Options:
-Try again later: This is a temporary issue and will be resolved in a day or two. Try to set up your Capital One Credit Cards then.
– 88888 accounts associated with this customer ID have been synced with QuickBooks’ bank feeds. If otherwise, contact your financial institution.”
When downloading transactions from Bank of America, a similar error message may appear, as shown below.
“You’re no longer connected to Capital One – Credit Cards. Set up your connection again to continue using bank feeds.”
If you want to disable the bank feed for the account to rejoin it, you may see error warnings similar to the one below.
“Your attempt to deactivate the account failed. Try again after some time. If this error persists, contact your administrator.”
The good news is that basic methods can be used to fix these error messages successfully. Let's read the text further to understand the many causes of this problem and find pertinent answers.
You can contact an experienced QuickBooks specialist by dialing TFN (855)-955-1942 if you require prompt assistance in fixing the QuickBooks error code 88888.
Why Does QuickBooks Desktop Give You Error Code 88888?
The following are all of the leading causes of QuickBooks error 88888:
QuickBooks Desktop is no longer up to date
The QuickBooks company file may be corrupt
The installation of QuickBooks may be faulty or lacking
There is a problem with QuickBooks and Windows OS not working together
There is a slow or erratic network connection
We will go on to the next section to identify suitable fixes for the mistake now that you are aware of its leading causes
2 Tested Methods to Fix the QuickBooks Error 88888
Let's promptly put all of the remedies listed below into practice in the appropriate order:
Method 1: Create a New Account for Bank Feeds
The easiest method to resolve QuickBooks issue 88888 is to deactivate the bank feeds account and make a new one. Here's how to accomplish that:
Turn off the bank feed account
The procedures to deactivate the bank feed account are as follows:
Select the Chart of Accounts option from the Lists menu
Click Edit Account after performing a right-click on the account you want to disable
Press the Bank Settings button
Select Deactivate all online services, then OK
Click Save & Close at this point
Create New Bank Account
To set up a new bank feed account, follow these steps:
Go to Lists >> Chart of Accounts
Right-click anywhere on the Chart of Accounts window and click New
Choose Bank in the Account Type field
Fill in the account name of that bank in the Account Name field
Click on Save & Close when finished
Combine both bank accounts
As explained below, you can combine the two accounts by giving the old bank account the name of the new account.
Select Edit with a right-click on the previous account
In the Account Name field, enter the new account's actual name
Select Yes when the merging warning dialog box appears
Transactions in the new bank feed account are now available for download. If you continue to get QuickBooks problem 88888, you should try the following fix
Method 2: Manually Close the Previous Bank Feeds Account
In QuickBooks, the 88888 error number can be easily fixed by manually deactivating the previous bank feeds account. You must export the chart of accounts to Excel, make changes to the file there, and then import it back to make these changes. This is how to achieve it:
Chart of accounts for export
The chart of accounts can be exported to an IIF file in the following manner:
First of all, make sure to quickly switch to single-user mode if QuickBooks is currently running in multi-user mode
Now select the Utilities tab from the window's File menu
After selecting Export, select Lists to IIF Files
After choosing the Chart of Accounts, click OK
Browse the IIF file and select the location where you want to store it
Enter the filename. Choose Save now
Modify the Excel IIF file
Let's move forward and make the following changes to the IIF file in Microsoft Excel:
Open the File menu in Microsoft Excel
After selecting Open, navigate to the IIF file's saved location. Select All Files from the File type dropdown if you are unable to find the IIF file
Click on the IIF file now, then select Open
Select Next and Finish as necessary when the Text Import Wizard appears
To find QB ONLINE, scroll down
Change Y to N in each of the following columns:
OLBANKING
OLBILLPAY
OLENABLED
OLTAB
Select Save from the File menu. You can continue to use the current format by clicking Yes
Lastly, shut down Microsoft Excel
IIF file import into QuickBooks
Finally, you must import the IIF file into QuickBooks Desktop using the steps outlined below:
Open QuickBooks Desktop
Select Import from the File menu
Choose the export from IIF files option now
Open the folder in which the IIF file was stored
After selecting the appropriate IIF file, click Open
Lastly, when you receive a confirmation stating that the import was successful, press OK. Verify that the lightning bolt or blue circle has disappeared to confirm that the bank account has been deactivated. Chart of Accounts, then Open Lists
Do you want to know about the QuickBooks Error 15240? Then visit this blog
Winding Up
Talk to our QuickBooks cloud hosting providers at TFN (855)-955-1942 to easily troubleshoot bank feeds, web connect import issues, and errors, and learn cost-effective troubleshooting techniques for your company. We can be reached by phone.


Comments
Post a Comment